-
Solutions
Solutions for
K-12
K-12
Learn MoreEducator & Staff Training
Educator & Staff Training
Improve compliance and deliver critical professional development with online courses and management system
Learn moreStudent Safety & Wellness Program NEW
Student Safety & Wellness Program
Keep students safe and healthy with safety, well-being, and social and emotional learning courses and lessons
Learn moreProfessional Growth Management
Professional Growth Management
Integrated software to manage and track evaluations and professional development and deliver online training
Learn moreAnonymous Reporting & Safety Communications
Anonymous Reporting & Safety Communications
Empower your school community to ask for help to improve school safety and prevent crises before they occur
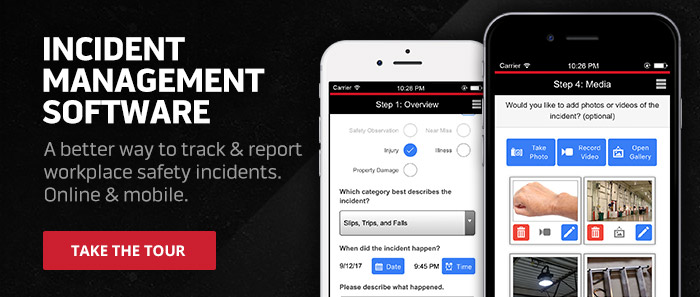
Learn moreIncident & EHS Management
Incident & EHS Management
Streamline safety incident reporting and management to improve safety, reduce risk, and increase compliance
Learn moreCareer & Technical Education NEW
Career and Technical Education Solutions
Maximize Student Outcomes with Our All-in-One Work-Based Learning Platform and CTE Courses.
Learn moreHigher Education
Higher Education
Learn MoreStudent Training
Student Training
Increase safety, well-being, and belonging with proven-effective training on critical prevention topics
Learn moreFaculty & Staff Training
Faculty & Staff Training
Create a safe, healthy, and welcoming campus environment and improve compliance with online training courses
Learn moreCampus Climate Surveys
Campus Climate Surveys
Simplify VAWA compliance with easy, scalable survey deployment, tracking, and reporting
Learn moreAnonymous Reporting & Safety Communications
Anonymous Reporting & Safety Communications
Empower your faculty, staff, and students to take an active role in protecting themselves and others
Learn moreIncident & EHS Management
Incident & EHS Management
Streamline safety incident reporting and management to improve safety, reduce risk, and increase compliance
Learn moreManufacturing
Manufacturing
Learn MoreSafety Training NEW
Safety Training
Elevate performance and productivity while reducing risk across your entire organization with online training.
Learn moreFood Safety Training NEW
Food Safety Training
Empower your workforce with industry-leading training solutions designed for Food and Beverage Manufacturing.
Learn moreIndustrial Skills Training NEW
Industrial Skills Training
Close skills gap, maximize production, and drive consistency with online training
Learn morePaper Manufacturing Training
Paper Manufacturing Training
Enhance worker expertise and problem-solving skills while ensuring optimal production efficiency.
Learn moreHR & Compliance
Provide role-specific knowledge, develop skills, and improve employee retention with career development training.
Learning Management System (LMS)
Learning Management System (LMS)
Assign, track, and report role-based skills and compliance training for the entire workforce
Learn moreEHS Management
EHS Management
Track, Analyze, Report Health and Safety Activities and Data for the Industrial Workforce
Learn moreSafety Communication
Safety Communication
Enhance the safety for the industrial workforce with two-way risk communications, tools, and resources
Learn moreFire Departments
Fire Departments
Learn MoreTraining Management
Training Management
A training management system tailored for the fire service—track all training, EMS recerts, skill evaluations, ISO, and more for 100% of training in one place.
Learn moreCrew Shift Scheduling
Crew Shift Scheduling
Simplify 24/7 staffing and give firefighters the convenience of accepting callbacks and shifts from a mobile device
Learn moreChecks & Inventory Management
Checks & Inventory Management
Streamline truck checks, PPE inspections, controlled substance tracking, and equipment maintenance with a convenient mobile app
Learn moreExposure and Critical Incident Monitoring NEW
Exposure and Critical Incident Monitoring
Document exposures and critical incidents and protect your personnels’ mental and physical wellness
Learn moreEMS
EMS
Learn MoreTraining Management and Recertification
Training Management and Recertification
A training management system tailored for EMS services—EMS online courses for recerts, mobile-enabled skill evaluations, and more for 100% of training in one place.
Learn moreEMS Shift Scheduling
EMS Shift Scheduling
Simplify 24/7 staffing and give medics the convenience of managing their schedules from a mobile device
Learn moreInventory Management
Inventory Management
Streamline vehicle checks, controlled substance tracking, and equipment maintenance with a convenient mobile app
Learn moreWellness Monitoring & Exposure Tracking NEW
Wellness Monitoring & Exposure Tracking
Document exposures and critical incidents and protect your personnels’ mental and physical wellness
Learn moreLaw Enforcement
Law Enforcement
Learn MoreTraining and FTO Management
Training and FTO Management
Increase performance, reduce risk, and ensure compliance with a training management system tailored for your FTO/PTO and in-service training for 100% of training in one place.
Learn moreEarly Intervention & Performance Management
Early Intervention & Performance Management
Equip leaders with a tool for performance management and early intervention that helps build positive agency culture
Learn moreOfficer Shift Scheduling
Officer Shift Scheduling
Simplify 24/7 staffing and give officers the convenience of managing their schedules from a mobile device
Learn moreAsset Mangagement & Inspections
Asset Mangagement & Inspections
Streamline equipment checks and vehicle maintenance to ensure everything is working correctly and serviced regularly
Learn moreEnergy
Learn MoreSafety Training
Safety Training
Elevate performance and productivity while reducing risk across your entire organization with online training.
Learn moreEnergy Skills Training
Energy Skills Training
Empower your team with skills and safety training to ensure compliance and continuous advancement.
Learn moreHR & Compliance
Provide role-specific knowledge, develop skills, and improve employee retention with career development training.
Learning Management System (LMS)
Learning Management System (LMS)
Assign, track, and report role-based skills and compliance training for the entire workforce
Learn moreEHS Management
EHS Management
Track, analyze, report health and safety activities and data for the industrial workforce
Learn moreLone Worker Safety
Lone Worker Safety
Enhance lone worker safety with two way risk communications, tools, and resources
Learn moreGovernment
Learn MoreFederal Training Management
Federal Training Management
Lower training costs and increase readiness with a unified system designed for high-risk, complex training and compliance operations.
Learn moreMilitary Training Management
Military Training Management
Increase mission-readiness and operational efficiency with a unified system that optimizes military training and certification operations.
Learn moreLocal Government Training Management
Local Government Training Management
Technology to train, prepare, and retain your people
Learn moreFire Marshall Training & Compliance
Fire Marshall Training & Compliance
Improve fire service certification and renewal operations to ensure compliance and a get a comprehensive single source of truth.
Learn moreFire Academy Automation
Fire Academy Automation
Elevate fire academy training with automation software, enhancing efficiency and compliance.
Learn morePOST Training & Compliance
POST Training & Compliance
Streamline your training and standards operations to ensure compliance and put an end to siloed data.
Learn moreLaw Enforcement Academy Automation
Law Enforcement Academy Automation
Modernize law enforcement training with automation software that optimizing processes and centralizes academy information in one system.
Learn moreEHS Management
EHS Management
Simplify incident reporting to OSHA and reduce risk with detailed investigation management.
Learn moreArchitecture, Engineering & Construction
Architecture, Engineering & Construction
Learn MoreLearning Management System (LMS)
Learning Management System (LMS)
Ensure licensed professionals receive compliance and CE training via online courses and learning management.
Learn moreOnline Continuing Education
Online Continuing Education
Keep AEC staff licensed in all 50 states for 100+ certifications with online training
Learn moreTraining
Training
Drive organizational success with training that grows skills and aligns with the latest codes and standards
Learn moreEHS Management
EHS Management
Track, Analyze, Report Health and Safety Activities and Data for AEC Worksites
Learn moreHR & Compliance
HR & Compliance
Provide role-specific knowledge, develop skills, and improve employee retention with career development training.
Safety Communication
Safety Communication
Enhance AEC workforce safety with two-way risk communications, tools, and resources
Learn moreCasino
Casino
Learn MoreAnti-Money Laundering Training
Anti-Money Laundering Training
Reduce risk in casino operations with Title 31 and Anti-Money Laundering training compliance
Learn moreEmployee Training
Employee Training
Deliver our leading AML and casino-specific online courses to stay compliant with national and state standards
Learn moreLearning Management System (LMS)
Learning Management System (LMS)
Streamline training operations, increase employee effectiveness, and reduce liability with our LMS for casinos
Learn moreEHS Management
EHS Management
Simplify incident reporting to OSHA and reduce risk with detailed investigation management
Learn moreEmployee Scheduling
Employee Scheduling
Equip your employees with a mobile app to manage their schedules and simplify your 24/7 staff scheduling
Learn more -
Industries
Industry
-
Resources
Resource Center
Expert insights to boost training
Resource type
Course Catalogs
-
Company
-
Course Center


